

Shortly after making the last blog-post, my radio operating activities were severely curtailed by QRM that registered well over S9 across all the HF bands. It wasn’t continuous but would come and go seemingly at will throughout the day and night – there was never a time when I could be sure it wasn’t going to obliterate whatever I was listening to. Several times it would appear while I was in the middle of a QSO, and cause me to QRT prematurely. I hoped that the QRM would disappear as mysteriously as it arrived, but after a few weeks, this “hoping” approach didn’t seem to offer as much, well, hope as it had before.
I live in a 100 year-old house that was converted several decades ago to individual studio apartments. The first step was to verify that the QRM was coming from my building, so I walked around, both inside and outside, with a small battery-operated portable Grundig shortwave receiver. Inside the house, the QRM had a fairly even signal strength, becoming a little stronger as I got closer to the walls. When walking outside the house, the QRM faded rapidly, only becoming stronger as the radio got closer to the outside walls of the house. I concluded that the QRM was being carried on the AC wiring of my apartment building and was being generated by something plugged into the AC.
I know all of my neighbors, and relationships with all of them are cordial, except for one. She decided a while back that she just didn’t like me, and I tired of trying to make peace. It seems that wherever I go, there’s always one, but that’s a different story Even though I get along with nearly all of my neighbors, I wasn’t sure how successful I’d be approaching each one individually and requesting permission to go on an RF snooping exercise inside their apartments. It wasn’t really something I fancied doing.
So what to do? I had no idea, and for the next week or so, had partially resigned myself to the idea that I was just going to have to deal with the fact that I was now living in an environment that made my ham radio and shortwave listening activities much, much more challenging. How very frustrating! Many times in the last few weeks, I had asked myself if anything in my apartment had changed recently and every time the answer I came up with was that it hadn’t. Then I remembered something. Recently, I started fostering a sweet and very shy 10 year-old cat called Chala. You can see her at the end of this last blog-post. The foster agency with whom I was working gave me an electric pet heating pad for her – and that was at about the same time the QRM began! It was like a light-bulb going on in my head and of course, it was too good to be true. But it wasn’t – I unplugged the heating pad and the QRM disappeared instantly.
The level of QRM was so high and so well distributed throughout the whole house, it was hard to believe that a little 9″ square heating pad could cause so much interference, but it sure did. Luckily, I don’t think she really needs it anyway. It’s just as well, because it’s not going to be used at this QTH any more. Any locals want a pet heating pad for free?
Be warned – this pet heating pad will radiate S9+ QRM from the wiring in your house/apartment on all HF bands!
I have been doing very little radio recently other than checking into the occasional SSB net while doing other things, so there is no news of any new home-brew projects I’m afraid There is nothing planned either, so I may be posintg even less frequently in the future than I have been doing in the past. My interests are shifting back towards trying to get as much of my music collection as possible transferred onto hard drive in case I purchase an RV and take to the road in a few years. The other thing that has been on my mind is cats. I’ve begun the steady inexorable march towards becoming a certifiably crazy old cat guy. My new companion, Chala, is a sweet kitty, but she’s very shy. My last cat, Rug, was a lot more outgoing and I miss that. Chala’s great and I derive a lot of of satisfaction from giving her a safe, comfortable home after her ordeal on the streets, but I have been wanting a little more kitty interactivity.
It was with this general mindset that I made a trip to the Oakland Ham Radio Outlet about a month ago in order to buy an 8-pin mic connector. It was also an excuse to browse the magazines and books. While standing at the counter, the employee who was helping me walked out from the back room and was being followed by a little kitten, who was happily prancing around and generally being very friendly to anyone in the vicinity. HRO wasn’t a place I’d normally expect to see a cat, so I was curious to know why she was there. It turned out that Nick, one of the employees, had discovered her trying to keep warm that morning by pressing herself up against the engine of his truck in the parking lot. He pulled her out, and she spent the rest of the day in the store happily attaching herself to the employees. When she jumped up on the counter, stood on her back legs, put her two front paws on my shoulders and gazed at me, I was hooked. Then when she curled up on the counter in front of me, pressed her little body up against me and started purring, I was a goner. I asked Mark WI7YN, the manager, what he was going to do with her. He said that he didn’t want a store cat, so had been thinking of asking the customers if they wanted a kitty. Without giving it a second thought I said that I’d take her, bundled her into my backpack and cycled home with her. So began a love affair with this fabulous little kitty companion -
What to call her? I wanted a name that reflected where she was found, but anything too ham radio oriented wouldn’t make sense to my non-ham friends (who are most of the people I know.) In the same way that hams have both a regular “civilian” name and a call-sign, this little kitty has her regular name, which is Sprout – as she’s a cute little Sprout! Her ham radio name is “Sprat The QRP Cat”. I hope the GQRP Club approves -
Sprat The QRP Cat
I still haven’t used the 8-pin mic connector I bought that day but I’m looking at it this way – I paid an $8 fee to adopt a kitty and had a free mic connector thrown in. Thank you Mark WI7YN and the team at Oakland HRO.
PS – Sprat The QRP Cat was not micro-chipped and not spayed. The vet estimated her age at 5 months. She has since been micro-chipped, spayed and has had her shots. She’s in fine shape!
A few days ago, Bryan Herbert KE6ZGP, posted on Facebook that he’d come first place in his section for Single Op QRP phone in the 2011 ARRL 10-Meter contest and posted a picture of his certificate. I thought it was pretty neat-looking and gave him my congratulations, telling him that I was envious, but happy for him, and also noting that I’d never won anything like that, as 2 hour sprints were about the most I had any kind of stamina for.
Then a little over an hour later, the front doorbell rang. It was the mailman with a few packages for my neighbors and a large brown envelope for me, containing this -
I had completely forgotten entering the ARRL 10-Meter contest. It was almost a year ago! I had participated (casually), submitted my log, and promptly forgotten about it. Now I know that I am by no stretch of the imagination even a semi-serious contester, so figured that there probably hadn’t been many other QRP CW contenders in my AARL section. On checking the ARRL site I found that there had been just one other. Nevertheless, I was very happy to have this piece of paper, which is already framed and hanging on the wall.
In other news, I have been doing no home-brew – sorry about that. My INTJ mind is either very pre-occupied with something, or not noticing it at all. Currently, I am engrossed with the task of committing as many music CD’s as possible to hard drive in order to de-clutter my living space. It’s all part of a long-term plan for the future which may include living in an RV, or simply another apartment. Either way, I want less stuff, and 10,000 music CD’s are awful heavy when it comes to moving time. While busying myself with the task of ripping and scanning during the day, I have had the K2, my main station rig, tuned to 40M and in particular, the Noontime Net on 7268.5 KHz. My mind works in strange ways, and for the 3 years I was into CW, that was all I was interested in. I had spent plenty of time operating SSB (and FM on the 2-meter band) in the past and it no longer held any interest for me – it really didn’t. Every now and again, I would tune up to the phone portion of whatever band I happened to be in and after just a few minutes of listening, wonder how anyone could remain interested in amateur radio if SSB was their main mode of operation. I like the mental challenge of decoding a CW signal in my head, and that is as much of an attraction to me as the radio part. Decoding SSB in my head was a skill I learned when very young, so there’s not much challenge there!
Nevertheless, while busying myself with the task of ripping CD’s and scanning all the artwork, I had the K2 tuned to 7268.5 KHz from about 9:30am – 2pm every day to listen to the Noontime Net. I have never done a lot of listening to nets before and at first, couldn’t quite understand the attraction of checking in to a net on a regular basis when the main purpose of doing so seemed to be to just check in and then not do much else. However, there is a little bit more to it than that, and after a few weeks of listening, I started to get a feel for it and checking into the net became a welcome part of my daily routine.
The Noontime Net is a traffic net, and traffic is indeed passed on occasion. After a few weeks of listening almost daily (at first on the WBR regen receiver when I was still fresh out of building that) I began to recognize the regular characters, including the very distinctive voice of Clyde AA7WC who took early check-ins daily until his recent illness. I checked in a few times, and then having the radio on and listening to the net in the background as I did other things around the shack, checking in on an almost daily basis started to become a welcome part of my daily routine. Many days, I will check in fairly early, and the re-check later. It’s also interesting to listen to many of the same stations regularly to see how propagation affects how we all hear each other – and this brings me to the aspect of the net that has interested me the most in the last week or two.
I had been checking in to the Noontime Net with my K2′s full output power of 15W. About 10 days ago, I decided to dial down the power to see whether I could still check in with one of the net control stations. On CW, you can turn the power down to 100mW, and on SSB, 1W. I dialed down to minimum SSB power and called Lynn KV7L in Princeton, Oregon. I thought I was running 100mW but forgot that on SSB, even though the K2 may indicate an output power of 0.1W, it is actually putting out 1W. To my surprise, Lynn gave me a 58 report. He is 412 miles from me. I also got a 59 report from a station in Bakersfield, about 245 miles to the south. Thinking I was running 100mW, I was ecstatic but in retrospect, a 58 report from a station 412 miles distant when you’re running 1W of SSB is still pretty good. Since then, I have regularly checked into the net with just 1W and am heard well by KV7L in Princeton, OR, W6FHZ in Reno, Nevada and N7WH in Boise, Idaho.
I often received unprompted reports of good audio too, for which much of the credit has to go the K2.
All of this has gotten me quite excited about seeing how low I can take the power and still successfully check in to the Noontime Net. I cannot dial the power on my K2 below 1W on SSB, so the next step is an attenuator. Even though I have not been doing any home-brew and am concentrating most of my efforts on non-ham radio pursuits, I think an attenuator is in my immediate future. I would love to be able to tell net control that I am running just 50mW – or even 10mW! Stay tuned to this space. Maybe I can get something together in the next few weeks. (EDIT – I ordered an attenuator online before this post was even finished – keep reading.)
The upshot of all of this is that although when people think of QRP, they usually think of CW, and the 13dB disadvantage of SSB compared to CW is well-known, you can still achieve things with QRP SSB. Bryan Herbert KE6ZGP has made many great DX contacts with just 5W of SSB (and even FM during 10M openings) and he told me recently how he thinks the potential of QRP SSB is underestimated.
On another tack, I was in Cost Plus the other day and saw a mint tin that was just crying out to have something built in it. Some people think of electronic gadgets as boxes of “black magic” and indeed, even us hams think of radio as quite magical. I like to put as many of my mint tin projects in different looking tins as possible, to make them easier to tell apart from each other. I think this tin fits the bill perfectly. What piece of black magic could I build into this enclosure?
My recent experiences successfully checking into the Noontime Net with just 1W PEP of SSB made me keen to see if I could check in with even less power. The minimum amount you can dial the power down to on the K2 on SSB is 1W, so to get it down further I would need an attenuator. I was looking for a cheap way to do this without having to build anything, and settled on this 20dB inline attenuator that I got from eBay for $6.99 including shipping -
I like it because unlike the step attenuators in regular enclosures, I don’t have to come up with an extra BNC to BNC cable. It’s quick n’ dirty n’ cheap. Without setting up a separate receive antenna, the attenuator also attenuates the signal on receive, but as I plan on initially using it to check in with net control stations that are very strong here, that won’t matter.
In theory, when I set the K2 to 1W and connect the output of it to the attenuator, which is terminated in a 50 ohm load, the 1 watt should be attenuated by 20dB, giving me a final output signal of 10mW into 50 ohm, but when I connected the output of the K2 (set at 1W in CW mode) to my OHR WM-2 QRP Wattmeter, the output of which was terminated in a 50 ohm load, I measured 40mW and not 10mW. I do believe the meter to be calibrated accurately so I am not sure what is going on here.
The next step should be to construct my own attenuation pad to verify these results but for the meantime, the Noontime Net was in progress and I wanted to see if net control could hear me. KD7RTE was taking check-ins and couldn’t hear me, but Lynn KV7L in Princeton, OR gave me an S3. He is 412 miles distant – not bad for 40mW of SSB.
I have gotten into the habit of checking into this net with 1W PEP and I think I will continue to do so, but the quick n’ dirty experiment with QRPp was pleasantly fruitful. I kind of wish it was possible to use the front panel control on the K2 to dial the power all the way down to 100mW on SSB, the way you can on CW – or even lower. QRPp is fun! 40mW is flea power, and it’s especially gratifying for a signal of such low power to be copied 412 miles away on SSB.
In other news, it has become harder to operate the radio, because Sprat The QRP Cat has decided that she likes biting the fingerpieces of my Bencher paddle. I try to put the K2 in test mode so she doesn’t transmit. When she’s not practicing the code, she just likes to get in the way when I’m trying to operate the radio, and steal the spotlight -
Today is the last full day of the TX5K team’s operations from Clipperton Island and they have already dismantled site B. Site B was mostly CW which meant I had to abandon my hopes of getting them on 40 and 30 in order to achieve a clean sweep on QRP CW for all bands 80 – 10M. However, getting a single DXpedition on 6 bands is a first for me, and I’m pretty happy with it.
Clipperton Island is an interesting place. In modern times, 4 nations have fought for ownership, partially for it’s strategic positioning, and partially for it’s surface layer of guano (translation – the island is covered in bird-droppings.)
The last attempt to permanently colonize Clipperton ended in tragedy in 1917. I’ll leave you to read about it but as Joel KB6QVI said, a film could be made from the drama that occurred on this small island in the North Pacific. Indeed it could, and not much in the way of dramatic license would need to be taken in order to make the story compelling for a modern movie-going audience. The Wikipedia entry about Clipperton Island is here (opens in a new window), but you’ll find a more lively read in this article.
Two things struck me almost immediately about TX5K -
1) It was a well-run DX-pedition. Good operators with good ears. I’m referring to the CW side of the DXPedition as I almost never use SSB when DX’ing,
2) The ability to see the QSO you have just made on a map on their website, as well as see your QSO in their online log is fantastic. No waiting for a log to be uploaded – the website updates every 60 seconds and with each of the 6 QSO’s I made, I saw myself in the log no more than 2 minutes after making contact. No more wondering whether to make an insurance QSO. This kind of technology can only have a positive effect on the QSO rate, although I did hear the op on 40M last night firmly talking to a station that had already made 5 QSO’s with him. Obviously that station wasn’t familiar with the near real-time online log. The software was written by expedition leader Robert Schmieder KK6EK, and sets a new standard for DX-peditions of this size, IMO.
Here’s how I managed. Got ‘em on 6 bands with 5W of CW to a 66 foot inverted vee with the apex at 47 feet (partially obscured and partially in the clear). As Justin VE3XTI commented, I sure suck at SSB
John AE5X got a clean sweep on CW from 160 – 10 which, knowing John’s experience, came as no surprise at all. I pretty much expect that kind of excellence from him!
Aerial photos of the DX-pedition site can be seen here. Teams who mount these events go to great lengths so that we can have our DX QSO’s, so no whining on the cluster because the entity you want is not currently taking QSO’s in your preferred mode from your part of the world. In fact, don’t treat the cluster as a message board, period.
Cordell Expeditions, who mounted the TX5K operation, are planning an expedition to Heard Island in Antarctica next year. Definitely one to look out for.
In the meantime, I’ve got my sights set on 9M4SLL, which takes place March 10th – March 18th. Thanks for the tip-off Jason
About a week and a half ago, I received an e-mail from Rich W9RNK. After a long period of home-brew inactivity (about 20 years) he decided to pick up the soldering iron and start building again. He said that my post on building N1BYT’s WBR Regen Receiver (the most popular post on this blog by far) had inspired him and I consider that a great compliment. If one of my posts inspires someone to do something they haven’t done before, or haven’t done in a long time then in my mind, it completely justifies having and keeping this blog.
He did get his WBR receiver working after some initial setbacks It seems that his problems were caused by using a core material for the inductor that wasn’t suited for the frequency. He used a toroid with a blue core, which is quoted as not being suitable for frequencies over 3MHz. On substituting the recommended yellow color-coded toroid, the receiver started working. In his write-up, which I link to below, he shows the schematic of 7N3WVM’s version of the tank circuit which includes a 0.22uH inductor from the center-tap to ground. The QRP-Tech Yahoo Group run by Chuck Adams K7QO made the WBR the subject of an informal group-build not too long ago and I noticed that some of the members experienced problems with sensitivity. Steve AA7U found that adding a choke from the center-tap to ground alleviated the sensitivity problem. Based on his experiments, he determined that the optimum value is around 1uH. I had no problems with sensitivity, so my recommendation would be to build the WBR as per the original QST article, and to experiment with adding an inductor if you do experience low sensitivity. However, I do wonder why others have had these problems when I haven’t? In the original article, Dan mentions that the length of the stiff wire connecting the center-tap of the coil to ground should be about 1″. I was careful to make mine about 1″, as well as to connect it to the ground-plane of the PCB, as opposed to connecting it to some other grounded point on one of the potentiometers or the enclosure. That’s all I can think of but hey – if an inductor works for you, that’s great.
The other main issue Rich had with his WBR was drift. I hadn’t measured the drift on mine as it seemed to be quite good. However, prompted by his observations, I decided to take measurements on mine today. From a cold start, it showed by far the biggest drift rate in the first minute (no surprise there) by drifting 120Hz downwards. In the next 14 minutes, it drifted another 190Hz down, for a total drift of 310Hz in the first 15 minutes. In the next hour, it drifted another 240Hz down, and the hour after that, 100Hz. I would have been interested to see what the drift was in the 3rd hour but boredom, and the lure of other tasks to complete prompted me to stop! My WBR (which has an AF preamp stage, unlike N1BYT’s original design) still only draws 13mA so when using it, I used to leave it on all day. I’d find that I could set it on a net frequency, come back an hour or two later and hear little drift, so I’m thinking that had I measured the drift in the 3rd and 4th hours it would have been less still. Not world-class, but not bad at all for a circuit with no attempts made at temperature compensation, and intended just for general listening.
Here is W9RNK’s write-up detailing his odyssey towards a working WBR Regen. It’s a pdf file, so make sure you have a pdf reader on your computer.
Many thanks to W9RNK for writing this up, so that it can be shared with others. Hopefully it will serve as an inspiration to anyone else who hasn’t picked up a soldering iron in a while.
PS – I do, like Rich, think an AF pre-amp is a worthy addition. I took N1BYT’s advice and used the same pre-amp that he used in his OCR II Receiver (Sep 2000 QST). Here’s the schematic of the AF stages of my version of the WBR -
That’s it for now.
About a year and a half ago, I posted that I had completed the first beta version of the Etherkit CC-Series QRP CW Transceiver. It was a neat little rig, with low RX power consumption (of the order of 50mA – a bit less, I think), full DDS VFO coverage of any one HF band, a built-in keyer with memories, RIT and XIT, as well as firmware that could be updated at will with a simple AVR ISP programmer (you can get them for around $20). It also used a lot of SMT devices, and was my first serious project using these tiny parts (the KD1JV Digital Dial was the first).
My CC-20 beta worked, and I made quite a few QSO’s with it, including some DX. It wasn’t perfect though. The DDS VFO had some in-band spurs, the TX/RX switching produced a thumping sound, the input and output of the crystal filter weren’t as isolated as they should have been, you could hear some low-level processor noise on the receiver audio, and the sidetone sounded a little rough too. Although that sounds like a long list of woes, I think that anyone who designs circuits is used to tackling these kinds of issues one by one, until the dragon is slain. We (by which I mean Jason NT7S, the man behind Etherkit) did manage to improve the isolation of the crystal filter by a fairly good amount during this beta build.
Then he came out with the OpenBeacon kit and the EtherProg. I knew he hadn’t forgotten about the CC-series, but I’m thinking he wanted to get a few other kits up and running before coming back to tackle it again, which he duly did.
The rig has been renamed the CC1 and although it retains the same basic architecture, there are a number of changes and upgrades to the design. It is still a monoband QRP CW HF transceiver (available in your choice of band) with an output of 2 – 3W (depending on the power supply), and it still has a DDS VFO (tuned with a real knob!) that covers the entire band, as well as RIT and XIT (useful for working split), freq readout in morse code and a built-in keyer with memories. The firmware is still also upgradeable via an AVR ISP programmer. Although at this stage in the development it has not yet been implemented in the firmware, Jason thinks it should be possible to include APRS functionality and WSPR too. That’s quite a lot for a rig that is not much bigger than a pack of playing cards.
The beta kit arrived in a Priority Mail flat-rate box (what a neat sight on top of my mailbox!) The enclosure is to the left, in the middle was the bag of parts for the EtherProg (a separate Etherkit product which can be used to update the CC1 firmware). The big bag on the right is the bag of parts for the CC1 -
The CC1 parts bag opened up to reveal the inner packaging. The bag containing the bigger parts has been opened and those parts dumped into a mint tin. The EtherProg, as I mentioned, is a separate Etherkit product and is available now, but I’ve included it in this photo. You can see the board slid partially into the enclosure -
A view of the underside of the board. Our beta kits had the microcontroller pre-installed. Currently, this was the only way Jason could supply it to us flashed with the firmware, but regular production kits will not have this IC pre-installed (it will have the firmware already flashed though) -
In true Etherkit spirit (the phrase “Open Source Amateur Radio” is on their home page), the beta testing forums are open for anyone to view here, and the forum for the CC1 beta is here. Only beta testers can post in these forums, but anyone can post in the product support forums which are here (you have to register first.) The CC1 beta forums include schematics and an assembly guide which, although not final of course, will be of interest to anyone who might have an interest in the kit when it becomes available.
A couple of days of soldering, and the receiver section (which is about 85% of the circuit) was finished. Alignment consists of peaking 2 trimmer caps in the bandpass filter, and adjusting the BFO so that the wanted signal is in the center of the passband. The passband for my filter is not flat – there is a definite peak in the response, so I adjusted the BFO to place the wanted signal at the peak of the filter curve. I already had a noise source that I had built to adjust the filters for my K2, and Spectrogram on my computer (for the same purpose) so I used these to adjust the BFO frequency. Both the noise source and the use of Spectrogram are detailed here. With the receiver aligned, I have now spent every evening since just listening to it. I keep looking at it and thinking, “That little thing is a radio?”
Here’s the CC1 board with the receiver section completed -
You can see the GPS connector at the left-hand side of the board (the rear) immediately under the green key jack -
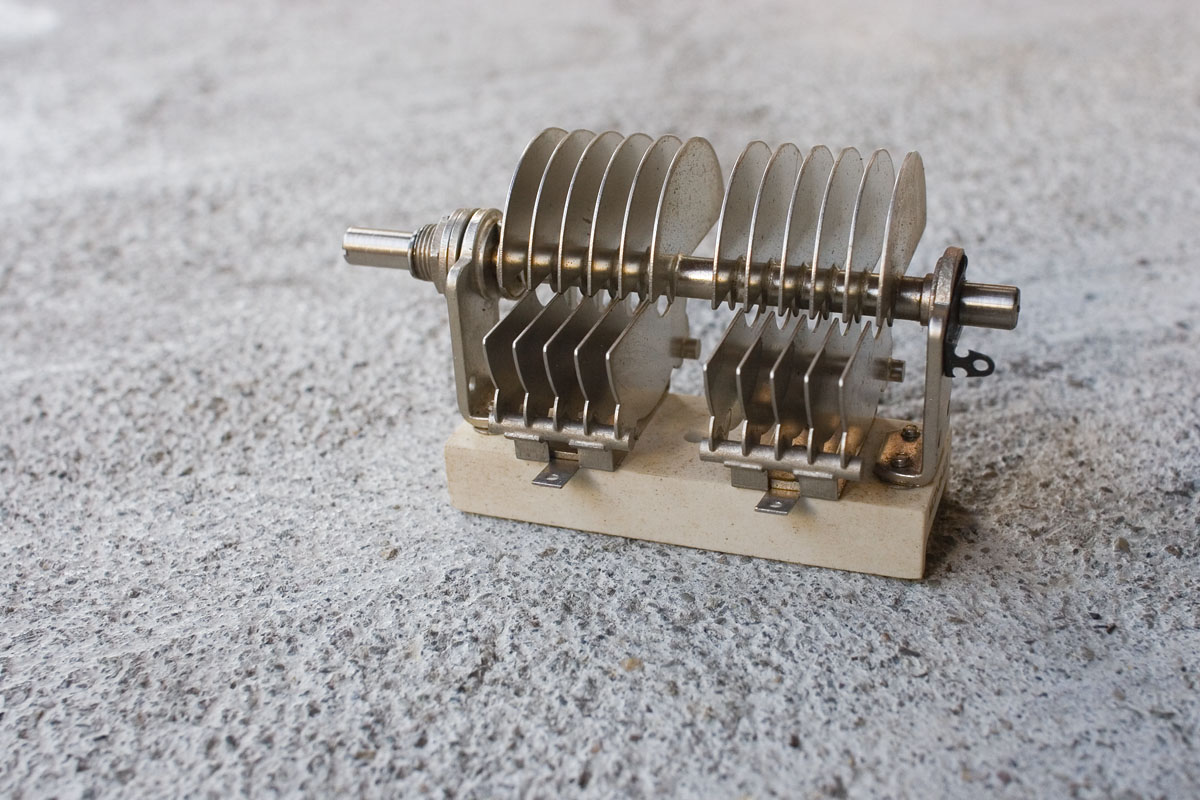
The onboard connectors are really great. They save a whole lot of hassle with wiring, and make it a lot easier to run the rig on the bench before putting it in an enclosure. In the following picture of the underside of the board, you can see U4, the 50Mhz master oscillator and to the right of it, U5, the DDS VFO chip. On the right-hand side of the board in the center, is U1, the NE5532 AF amplifier (I just saw a cat hair lying on top of U1 – those things get everywhere). You can also see the space for U2, the transmit buffer -
At first, I thought the receiver wasn’t functioning correctly, because on attaching an antenna, I heard only a very faint increase in background noise. I tweeted to Jason and informed him as such, as well as posting to the other beta testers in the forum. My theory was that the AF amp had low gain. As it turned out, it was a combination of the bandpass filter being way off it’s peak, and the initial BFO freq placing the signal fairly well outside the passband of the crystal filter. Had I thought to peak the trimmers before jumping to conclusions, I would have realized that all was well.
The receiver was sounding good. The DDS spurs that were present in my CC-20 beta are no longer an issue. The crystal filter has better isolation – there is still some room for improvement, and that will be improved further before it comes to market – in fact, Jason just suggested a circuit change in this direction that beta testers are implementing as we speak. The TX/RX switching is very smooth and the sidetone sounds nice. There is a sharp leading edge on the sidetone waveform which give a clicking sound, but that will just require some simple shaping, which, once again will be taken care of in the production model. The other issue, the processor noise that was present in the audio, is vastly reduced and by the time you read this, will most likely be cured altogether, as Jason just re-wrote the firmware, which I am waiting to apply to my beta. Things are looking very good for this little rig.
A couple more views of the board at this stage, before we move on -
Having confirmed that the receiver is working, the final push was on to build the transmitter and complete the rig. It didn’t take long – just the installation of 12 parts and 2 more toroids to wind.
Here’s the completed board, before installation in the enclosure -
The world of SMT seemed like a closeted world of intrigue and mystery before I built my first project using them. I had read web sites detailing the use of solder paste and hair dryers, or toaster ovens for soldering these tiny little parts. It was a while before I realized that you can actually solder them the good old-fashioned way – with a soldering iron and a roll of solder. I pick up resistors and caps and place them close to their final resting place on the board with a fine pair of needle-nosed pliers. Then, with a small jeweler’s screwdriver, I gently nudge them into their exact position on the pads. While carefully holding the part down with the tip of the screwdriver, I tack-solder one end in place. Then I solder the other end, and go back to the first end to properly solder it. I use a 1/32″ chisel tip and 63/37 .02″ solder with a mildly active rosin core. 0.015″ solder would be even better, as it’s easy to apply too much solder (which is where a good-quality de-soldering braid, such as Soder-Wick, proves invaluable.)
IC’s with fine lead pitch are a little trickier. The NE5532 AF amp was relatively easy, as the leads are far enough apart to solder them individually. Needless to say, a very clean and well-tinned tip is vital. I wipe my tip on a dry rag and tin it before every joint – unless I’m soldering a number of joints in quick succession one after the other, such as with IC’s. The AD9834 DDS chip has leads that are too closely-spaced to solder them individually. The technique that I learned from Jason involves soldering all the leads on one side with a big wodge of solder, paying no attention to whether the leads are bridged together with solder. Afterwards, you clean up the solder bridges with de-soldering braid and a larger iron tip. A larger tip is useful here because you can wick up the excess solder more swiftly in order to avoid destroying the chip. Jason posted a good description of how to do this in the assembly guide. Search for U5 on that page and you’ll find the description, along with a picture. Flux is said to be very helpful here. I managed it with no extra flux (other than that in the solder) , but plan on getting some for future use.
The CC1 is billed as a trail-friendly rig, and the kit will come complete with a pre-drilled enclosure with silk-screened front and back panels. The enclosure we received with our beta kits is the exact same enclosure that will go out with the kits, with the exception that ours weren’t drilled or printed. So the following pictures represent roughly what the final CC1 will look like, without the silk-screened panels. There might be a slight adjustment in the spacing of the controls before the final production model too.
Firstly, this one’s for size comparison with my CC-20 beta -
The board slides into rails in the side of the extruded aluminum case and is held in place by the nut on the BNC connector at the back. Here’s a couple of front views without the front panel -
Man, is this thing a beaut or what?
I’m very fond of this little rig. I’ve only made 1 QSO with it so far (with Jason NT7S) but have spent every evening listening to it. It’s great to have the earbuds in, listening to 40M on this diminutive little transceiver while working.
I’m hoping to get some audio up at some point, but it may take a while. If you’re wondering when you can get one of these, well, it’s still in development but at this point I think it’s safe to say that it will be coming out. I do know that Jason NT7S is a perfectionist and won’t release it until he feels it’s truly worthy, and all issues have been thoroughly worked out. The design is already very close to where it should be and there’s a great momentum behind it, but we still have a 2nd beta to go through Stay tuned and we’ll keep you posted.
The CC1 is coming……………………
I made my first ever QSO with the CC1 beta a week or so ago. It was with Jason NT7S (the designer of the CC1 and proprietor of Etherkit) and on top of that, it was the first ever CC1 to CC1 QSO. Very exciting! I was hoping to have been the first ever QSO Jason had with his CC1. That honor actually went to WA0JLY, but I did get to be Jason’s 2nd QSO.
He was recording video of the QSO, which is up on his website if you want to take a look, though I am rather embarassed by my sending. For some reason, I hadn’t plugged the paddle into the jack on the CC1 properly, and when I came back to Jason, the paddle went nuts and wasn’t sending what I wanted it to at all. I finally discovered the error, plugged it firmly into the jack and continued with the QSO. Jason for his part, (due also to nervousness at our historic QSO I’m guessing, just like me,) wished me 71 at the end of our brief exchange. I like that! As I pointed out to him, 71 is like 72, but even better. From now on, whenever I QSO with NT7S, I am going to sign off by wishing him 71. Perhaps that could become the default sign-off for any CC1 to CC1 QSO’s in the future? He also told me that my mess-up in sending due to not plugging the paddle in properly is one of those things that help create a narrative to remember these occasions with. Well, I guess so
I don’t normally collect QSL cards, but some are special. This one from Jason is one of those in my collection that have great meaning. In the early days of radio a QSL, instead of being seen as merely the final courtesy of a QSO, was the much-desired proof that a hard-worked for contact had taken place. The early hobbyist would labor hard building his entire station, and spending many hours adjusting and tweaking in order to make contacts with other amateur stations. QSL’s were highly-prized pieces of proof that validated the work of the experimenter. I got some of that feeling on receiving this card from Jason -
This, in my opinion, is a QSL in the best time-honored tradition of amateur radio. I’m running off to Fedex Kinko’s this morning to do a test-print of the custom QSL I’ve designed for my CC1 beta and hope to be spotting myself on QRPSpots later this week once I repair the final that I fried. I’m still not completely sure what I did, but it most likely had something to do with a stray clipped component lead or metal screwdriver
Nearly every evening on 40M, I hear Bill Crane W9ZN for an hour or two coming in from Chicago. He’s a good op. I’m not sure what his top speed is, but I often hear him conversing easily with others at around 25wpm. He always matches the speed of whoever he is talking to, which I think is one mark of a good op. I remember the first time I QSO’ed with KA7PUN a couple of years ago. We were conversing easily at what was my comfortable speed back then (which was probably around 16-17 wpm). I thought that was his regular comfortable speed until I heard him in QSO a few days later with another station sending much faster. I realized that he had matched my speed and felt very grateful to him for making me feel comfortable in that QSO.
Anyway, back to Bill. I first noticed him on the band for a style of sending that incorporates a variation on the “Ben’s Best Bent Wire” routine that commercial operators used to use in order to loosen up their wrists before a shift. At the time, I wasn’t familiar with this type of routine and only knew that Bill had a style that made him stand out on the band for me. Here’s what I’m talking about. This is Bill as recorded last night -
I imagine that a few decades ago, this kind of routine was more prevalent on the bands, but W9ZN is the only station I have heard doing it. Some people would probably prefer to perform their warm-up routines off the air, but it sure is a good way for Bill to be instantly identifiable. A little online research seems to indicate that he was a Chicago radio personality in the 60′s and 70′s, going by the name of Bill “Butterball” Crane. I’d sure like to QSO with him, but he never hears my puny 5W sigs. He’s running QRO, and a regular presence in the segment from 7031 – 7034 most evenings.
I’ve also been busying myself with making some new QSL cards, firstly for QSO’s I make with the CC1 beta. I was inspired by NT7S’ CC1 beta card, and wanted one for myself. I’m lucky to have Photoshop (CS2) and to have finally figured out the importance of layers and how to use them. The initial version of the CC1 beta card that I came up with looked good on the screen, but due to the fact that I didn’t have a profile for the printer at my local Fedex Kinko’s (they probably don’t have one), the card printed out a lot darker than it looked on my monitor, and some of the text ended up being buried in the background. I did eventually come up with 2 versions, both of which look OK when printed. One, in my opinion, looks better in print than the other, but I’m waiting to hear back from NT7S as to whether he agrees before I print up a few of one of these two. These are not scans of the printed cards, but jpeg renditions of the original Photoshop files. Bear in mind when you’re looking at these, that the printer in my local Fedex kinko’s prints files darker than they look on-screen, so if you’re thinking these images look a bit light, that is why -
I finally seem to be getting the hang of using Photoshop to do these kinds of layouts so, bolstered by the success of these cards, decided to make another one. It took me a while to scan the G-QRP Club logo and change it from black on a white background to white on a transparent background, but now I know how to do it, it’s a piece of cake -
Of all these cards, my favorite is my basic 2 color one. The following image, unlike the previous ones, is not a jpeg generated from the original Photoshop file, but a scan of the final printed card. I did this because the color of the card stock does a lot to make the card look good. It’s called “Sawgrass” and unfortunately, my local Fedex Kinkos won’t be restocking it once their current stock is gone -
It’s simple, effective, and prints out well on a variety of printers – no complex graphics that need to be rendered in accurate tones. On top of that, if I need to make a lot and am feeling a bit skint, it doesn’t look too bad in monochrome either.
I’ve blogged before about air-spaced variable capacitors. I’ve always liked ‘em, but I think my understanding of what makes a good one is maturing a little more. I was the winning bidder on a really nice-looking specimen on eBay a few days ago. Ever since placing the winning bid, I had been excitedly looking at the pictures of it posted by the seller. It looked great. How exciting when it arrived in the mail yesterday and I got a chance to see it “in person”, as it were! I got it for $11.50 and I think I scored -
It is NOS (New Old Stock) meaning that while it is old, it has never been used. Surprisingly, there seems to be quite a few of these high-quality NOS caps still floating around. Here are the specs for this series of variable capacitors from Hammarlund -
The cap that I scored has nickel-plated brass vanes. Brass is good, as it expands and contracts with changes in temperature less than aluminum does (the other main material from which variable capacitor rotors and stators are made.) Also good are the bearings on each end of the rotor shaft. I can’t see them, but I assume the bearings are hidden away. It gets better. This capacitor has wide-spaced plates, meaning less change in capacitance with temperature changes than a part with closer spacing. Oh – and this is all firmly mounted on a ceramic base. Ceramic is a great insulator and I’m thinking that this must also be good for the physical stability of the component with regards to changes in temperature.
I just noticed something. As you rotate the shaft clockwise, the capacitance increases. It’s normally the other way around. An end-stop prevents the shaft from rotating more than 180°, or this wouldn’t be an issue. This must have been intended for use with a drive mechanism that translated the rotation of the tuning knob into rotation of the capacitor shaft in the other direction. I hope that the length of shaft protruding from the other end is enough for me to connect to, otherwise it might end up on the shelf for a few more decades!
One thing you may not appreciate from these photos is the feeling of solidity. This is a beautifully engineered part. See how the shaft is off-center? This makes for a non-linear relationship between the rotation of the shaft and the change in capacitance. The change in capacitance occurs in such a way as to make the higher frequencies a little less cramped together, which is what happens with a capacitor where the relationship is strictly linear.
I mean, really – do variable capacitors get much better than this? I don’t have definite plans yet for this little beauty but if my current interest in regens continues, I can see it paired up with the Jackson Brothers Dual Ratio Ball Drive and Dial I just ordered from the UK and used as the main tuning cap in a general coverage regen receiver – all built on a generously-sized aluminum chassis with front panel. (EDIT – unless I am able to connect the ball drive to the rear end of the shaft, this is not going to happen. Fingers crossed.)
Scroll back up to the top of the page and look at this fabulously engineered piece of American history sitting on top of it’s original box. That’s what it feels like to me – a piece of American history, and I got it for a few bucks. I will feel terribly privileged to be able to incorporate it into my own project at some point, though I’m going to hang onto that box.
Incidentally, while riding around Oakland, I noticed that this commercial space is up for lease. It would be a good place for a ham-oriented business don’t you think?